

DIY outdoor fire pit – the first things to consider
Before getting started on your DIY outdoor fire pit, there a few things to consider:- Location, location, location. How big is your backyard or courtyard? Fire pits can cause sparks to fly and smoke to drift. Be sure to locate them away from any combustible material or structures. These can include decking, fencing, leaf matter and overhanging branches. It’s also important to have a hose or fire extinguisher located nearby. Will smoke drift into your neighbour’s yard, impacting them in any way? If so, you might want to consider another location.
- How often and how will you use it? Will it simply be a place to spend time with family and friends? Or will you use it for cooking food? Will it be for only the occasional fire, or something that you’re using every weekend?
- How much time do you want to spend on the construction? Are you looking to keep things as DIY-easy a possible (installing a pre-made fire pit) or construct it yourself from scratch?
- What are the rules in your area? Check your local council’s website for regulations around fire pits. It’s also important to stay informed about any fire bans in your area, each time you’d like to use it.
Fire pit safety
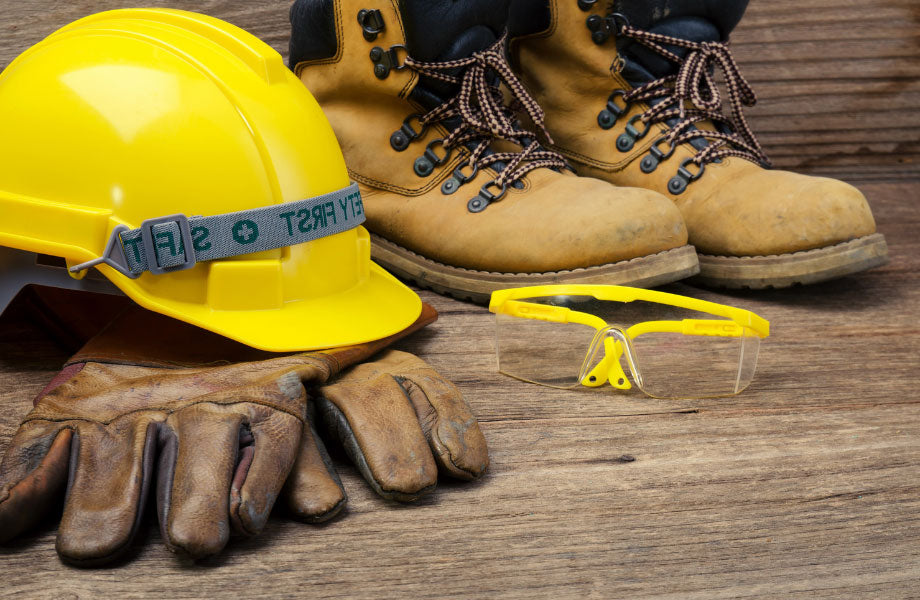
Always be prepared with the appropriate safety gear and required tools when creating your DIY outdoor fire pit. At a minimum, the safety gear we’d recommend are:- Eye protection
- Ear protection
- Work-boots
- Heavy gloves
- Wear heat-resistant gloves.
- Have a spark guard in place.
- Be sure that a hose or fire extinguisher are close to hand.
- Stay present as the fire starts, remains in use and burns out or is extinguished.
- Make sure the immediate area is clear from leaf litter and potential trip hazards.
- Be weather-aware. Fire pits aren’t a great idea to light if you’re experiencing a particularly windy day.

Best Methods for How to DIY an Outdoor Fire Pit
Easy method for pre-made fire pits
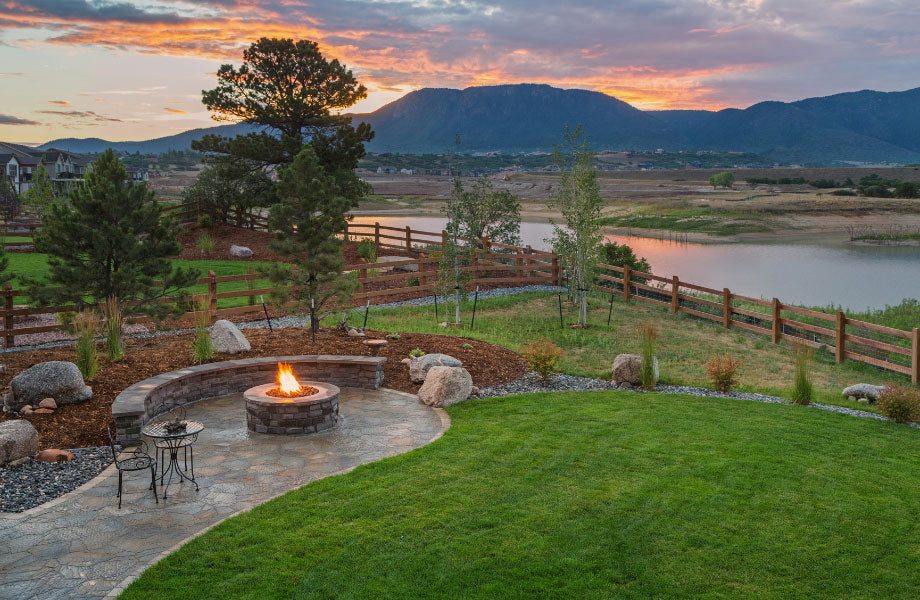
Pre-made fire pits are a fantastic option if your available yard space is limited and you are a little short on DIY time. They look sleek and modern and function well. At Rock’n’Soil, our Fire Pit 480 mm and Fire Pit 600 mm will suit most smaller yards and even larger courtyards. Our range of fire pit pebbles come in a range of textures, sizes and colours, giving you more flexibility of choice. For installation, we always recommend following the manufacturer’s instructions. And for the best results we also suggest clearing a circle larger than the size of the pit. Removing any sod, stones or roots (or any other debris) and then digging to about 12 cm deep. You can then pop your fire pit pebbles into the space, level and tap down. For a really swish finish, you can lay fire pit pavers on top of the pebbles and place your pit on top. You’re ready to get started!
Excellent method for constructing a block fire pit
Creating a DIY outdoor fire pit has some essential material considerations. It’s important to choose bricks that won’t crack under high heat.Step 1: Choose your feature blocks
Our favourite go-to bricks are:- Adbri Miniwall Retaining Wall Blocks. These blocks are easy to install and a great fire-pit option. They are simple in design and feature a natural rock texture. Available in shades of charcoal and oatmeal, they’ll suit most backyard aesthetics.
- Adbri Versawall Retaining Wall Blocks and Adbri Versawall Corner Retaining Wall Blocks. We love seeing these blocks used in combination. Their large rock face will create a modern façade for your fire pit. Available in charcoal, oatmeal and sunstone, there are options to suit your backyard.
Step 2: Gather your materials
Once you’ve got your fire-safe blocks, you’ll also need:- A shovel
- Road base (and possibly a small compactor)
- Spirit level
- Spray paint
- Masonry adhesive suitable for fire pit blocks, such as Liquid Nails Landscape
Step 3: Decide, clear and mark
Decide on your location. Clear the area completely (rake up any leaves and remove sticks, toys, anything that shouldn’t be there). Measure and mark the four sides of your fire pit with spray paint.Step 4: Prepare the area
With your shovel, dig out your marked area to about 2cm deep. Be sure to remove all lawn and roots. Use your spirit level to check the space is flat.Step 4: Add a base
If you’d like to, with a shovel, spread out your road base and carefully compact it. You may need to hire a small compacter to do this. Road base is a gravel blend that when compacted, forms a hard surface. When compacted, it will form a stable base for your fire pit. Check that it is level.
Step 5: Time to build
Lay your blocks around the four outer edges of the fire pit, taking care that they fit snugly together. To bond the second layer of blocks to the first, use a masonry adhesive. Keep checking your levels with the spirit level. Add a third layer of blocks if you wish, though two can be a sufficient height. Note that regular mortar isn’t sufficient to withstand the high heat of a fire pit, so masonry adhesives are a popular choice.Step 6: Decorative rocks
If you’d like to, add decorative fire pit rocks to the base of your fire pit.Step 7: Decide on a top
You may wish to have an open fire pit so you can watch the flames. At a minimum you will need a spark guard. Decide on whether you’d like to add a bowl or grill plate to your fire pit for cooking. If you need the top of your fire pit to be perfectly level, adding a final layer of cap stones is an idea, such as Adbri Versawall Retaining Wall Cap.